Rowland is a member of the Voyager team with the role of Voyager Evangelist. The information in this blog post is based on pre-beta software installed in early 2022. The final release will almost certainly have changes based on beta testing feedback.
In the Beginning
I discovered Voyager in December 2018, when I added a second pier and went looking for software to automate it.
I had an ACP Expert license for my first pier, and since I enjoy trying new software, decided it would be interesting to do a survey of available astrophotography / imaging automation products. The result is the Imaging Software Survey on this website.
I found a product made by an award-winning Italian astrophotograper, Leonardo Orazi, called Voyager. It was not well-known in the US, and the English docs were quite abbreviated. Nonetheless, I found it easy to setup and I got my scope running with a couple hours of tinkering. I run unattended all-night imaging and I was used to software hangs and crashes – not with ACP, but with other products I tried. Voyager was shockingly, boringly, consistently reliable. It just worked, all night, every night, patiently gathering photons while I slept. Very cool!
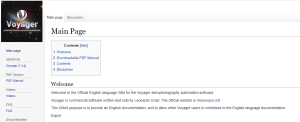 I decided to “give back” and help Leo with some English language documentation. I set up a Wiki and started from the beginning, documenting every screen, panel and function. Leo was super appreciative and pitched in to help – and eventually took the Wiki over and made it the official Voyager documentation.
In this process we became friends and exchanged ideas about many things, including of course astrophotography software and automation. Leo told me about a project he was working on in the background, “Voyager Advanced,” which would include automated target scheduling. The concept is simple, but the realization of it is complex. With most imaging software, you create a plan for each night that lays out how the night should run. Which targets to capture. In what order. When to start and when to finish each one. How many frames to shoot, etc. It can take quite a bit of planning – what will be up tonight? When does it rise to the desired altitude? Will the moon be too bright and/or too close to get a good capture?
With an automated scheduling approach, you tell the software your desired result and it decides, in real-time during the night, what target to shoot. For example, “I want 20 frames each of L, R, G and B of M31. Shoot only when the moon is down and the hour angle is plus or minus 2 hours of the meridian.” You create a defintion like that for each target you want and the software saves them in a database. There are many more constraints you can place on each target, including an overall priority and a “tie-breaker” scheduling rule, such as “oldest target added to the database.”
That’s it! The software does the rest. Even if an imaging session is interrupted by weather for several hours, when things start back up again, the software picks an appropriate target for the conditions at that time. It also keeps track of the number of frames captured so far, so if multiple nights are required to finish a target, it won’t duplicate anything that was completed in previous sessions.
Rowland Builds a Scheduler
Leo told me that Voyager Advanced was probably at least a year away, as it was a big project and he had a number of other tasks in the queue.
I like to tinker with programming, and as I learned more about Voyager, I realized I could build a primitive, but hopefully functional, external scheduler of my own. Voyager would do the heavy lifting – capturing the data. All my scheduler would do would be to tell Voyager what target to run next. It worked! Voyager includes an automation component called DragScript which lets you define a sequence of operations to execute. My “all-night imaging” script handled connecting to equipment, taking sky flats at the appropriate time, waiting for dark, running capture sequences, and shutting down. If my AAG Cloudwatcher detected unsafe conditions, my DragScript would pause imaging, close the roof, and wait for safe conditions to restart.
Instead of defining my targets by editing my DragScript, I added a call to my external scheduler program, written in Python and making liberal use of the great astro libraries, astropy and astroplan. My program returned with a “1” or “0” – meaning “there’s something ready to run” or “nothing ready now, wait and try later.” My DragScript either ran the target or waited a minute and called the scheduler again.
My scheduler worked! But like all “prototypes” vs “real products,” it was very crude and no where close to product quality. Hardly any error handling. No user interface – just configuration files. It was just enough to tide me over until Voyager Advanced was released, and its capabilities made me all the more appreciative of the convenience of automated scheduling – while its limitations made me all the more eager for a real product, Voyager Advanced!
Leonardo Builds a Scheduler
I peppered Leo with “how’s Advanced coming!?” inquiries over the next two years, and while Voyager releases came at a rapid pace, adding lots of useful functionality, I had no real idea of how soon it would be. Then one day in December, without warning or fanfare, Leo posted a normal release announcement – and one of the bullets was that the code for Voyager Advanced was in that release! He told us that Advanced was running in his observatory and started to share screen shots. He invited interested users to email him for details of the beta program. Needless to say my email went out a minute after reading the announcement. He wrote back and I agreed on the parameters to be a beta tester, which included an informal, but typical for beta testing, non-disclosure agreement.
A few days later Leo contacted me and asked if he could install Advanced on one of my piers to make sure its calculations worked at different coordinates from Italy. We started about two hours before dusk. The installation took about 30 seconds – just adding a new license file to my already working and up-to-date Voyager installation. He walked me through all the new menus and screens, and with about one hour to go before dark, I faced a question – did I dare try to go live tonight with only a short time remaining?
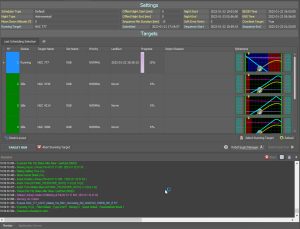
With most software, i wouldn’t dare. But my experience with Leo’s software has been consistently good. I install every development release, and despite the warning that it is not guaranteed to be stable, it has always worked for me. So I plowed ahead with Advanced. Adding it to my DragScript was a matter of replacing the call to my scheduler with a call to RoboTarget, the name for Voyager Advanced’s scheduler.
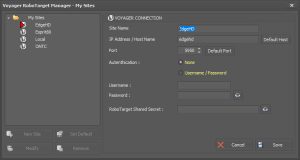
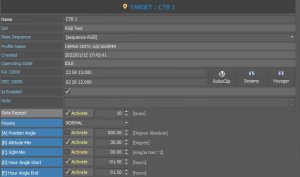
I added six targets to the RoboTarget database with the RoboTarget Manager.
Fingers crossed, I clicked “Run” on my DragScript and … long story short, it worked!
It captured data all night, starting and stopping at the appropriate times, and I woke up to another 80GB of data.
This was really cool! So cool, I felt it was a great time to re-join the Voyager team and help spread the word about Advanced. I contacted Leo and suggested I take on the role of “Voyager Evangelist” – a title used commonly in the software industry to designate someone in an outreach position, helping the community understand and make the best use of a product. I suggested that even during the “quiet period” of beta, the product was in such good shape that I could easily begin documenting it and sharing the information with the astrophotography community. Leo agreed, and this blog is my start on that endeavor.
Next: Part 2 of this series will give a high level overview, with screen shots, of setting up targets and running with Voyager Advanced.
Click Here to Leave a Comment Below
Leave a Reply: